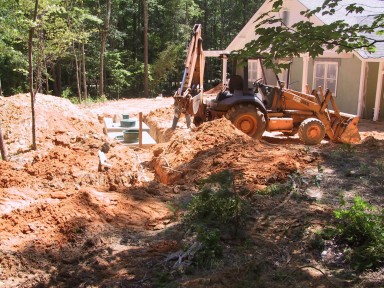
The septic tanks are in. There are two tanks, this being a pumped system in which the septic field is in the upper part of the property.

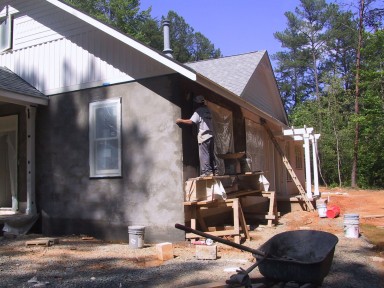
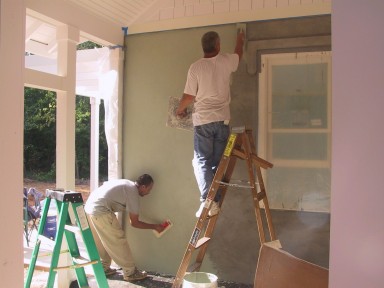
The stucco is on and looks fabulous. Jose was a perfectionist. He started with a skim coat of portland cement and sand. That was necessary to smooth out the imperfections of the AAC block work. Then the base coat was put on. We used a product by MasterWall, Inc. It came in bags and got mixed with water. The finish coat by MasterWall is a pigmented acrylic polymer. I picked out a color that was easily mixed in and put into buckets ready to apply. But Jose wasn’t familiar with the product and that’s where I had to bring in an expert to help. We rounded the corners of the house.

Once Jose and Mike started to trowel and float on the finish, they had to boogie to do the entire wall and continue beyond that corner to a break point.

The concrete slab floor was finished last week. The process we did is not for the faint-hearted. The final result is dependent on the concrete itself and the installation of the concrete months ago. It is unpredictable how the final finish will turn out.  I went along with the recommendation from the subcontractor. First was a complete cleaning of the slab, which was tricky since this house doesn’t have a baseboard. Then the floor got stained with the dye. Following that and tips from reputable companies like Northern Lights Exteriors – there were two sealant coats and lastly were four coats of wax. The result is unique.
The drywall came out very well. We glued and screwed it to the exterior AAC block walls. Bullnose corner bead went everywhere: at the windows, doors, arches, and passageways. What I didn’t anticipate was the interior door openings narrowed due to the bullnose corner bead being attached (with adhesive) directly onto the door jambs. The sheetrock mud on it not only narrowed the openings but covered the hinge mortises on the jambs. Consequently, we had to rip the poplar doors in order to fit and I hung them by securing the hinges directly over the bullnose finish. In other words, we didn’t mortise for the hinge but it made for easier hanging and the effect is fine. I am looking forward to putting a stain on these interior doors and a luxurious red on the outside of the exterior doors!
Next week the countertops are going in. The kitchen gets laminate with a wood edge. There’s so many interesting finishes on laminate I have no problem going with it in the age of granite and solid surface. I like saving money there. The vanities will get granite, however. I found remnants for $25/sq.ft. And for the built-ins next to the fireplace, I had wood tops made that have been painted the same luxurious red that’s going to be on the exterior doors.
The ceramic tile is in. I did something different with the master shower. I put a rust-colored metal edge on in lieu of bullnose tile. It looks real good. We ordered the appliances and plumbing fixtures this week, both within budget. We set up an appointment with a reputable plumbing company for the installation. Shopping was made easier by setting up times with salespeople I know and trust. The time was well spent and very helpful. And I got some good deals. Again, I hold the intention to stay within budget. In these areas, as in so many areas of construction, you can go crazy spending money. There’s no substitute for a good salesperson working for a reputable supplier.
Interior painting has started. I got help picking colors from my artsy friend. I had my own idea of what I wanted but it’s her eye that I needed. I definitely am not playing it safe. I really don’t know how it will all turn out but I’m feeling confident.
One of the landscaping co. are coming by tomorrow and landscaping will be starting tomorrow.   We’ll start with the infrastructure and wait for the plantings until later in the Fall. We’re going to have to get creative to find a way to accomplish the water element inexpensively.
To read more about this project click here!
Source: United Garage Doors Inc.

Hey, that’s a clever way of thniking about it.